Tired of serving chicken that’s disappointingly dry or lacks flavor beyond the surface? Imagine biting into a piece of chicken that is not only incredibly tender and juicy but also seasoned perfectly throughout. This isn't a culinary dream reserved for professional chefs; it's an easily achievable reality for every home cook, thanks to the magic of a simple chicken brine. With just five common pantry staples, you can unlock a secret that guarantees succulent, flavorful poultry every single time, transforming your everyday meals from ordinary to extraordinary.
Brining is a time-tested technique that promises to elevate your chicken dishes, whether you're grilling, roasting, or pan-frying. It's a surprisingly straightforward process that yields consistent, mouth-watering results, ensuring your chicken stays moist and tender, no matter the cooking method. Forget guesswork and bland bites – let's dive into how this fundamental method, starting with a powerful yet simple 5-ingredient chicken brine, can revolutionize your cooking.
The Science of Succulence: Why Chicken Brine Works Wonders
At its heart, brining is a brilliant method for infusing moisture and flavor deep into meat. When you submerge chicken in a salt solution, a fascinating scientific process unfolds. The primary ingredient in any effective chicken brine is salt, and its role is multifaceted:
- Moisture Retention: Through osmosis, the salt solution enters the chicken's muscle fibers. More importantly, the salt denatures some of the proteins in the meat. This process causes the muscle fibers to relax and unravel, allowing them to absorb and trap more water within their structure. During cooking, which typically causes muscle fibers to contract and expel moisture, these salt-modified proteins hold onto that absorbed water much more effectively. The result? Dramatically juicier chicken.
- Tenderization: As the salt works on the proteins, it also helps to break down tougher muscle fibers. This tenderizing effect contributes to that melt-in-your-mouth texture you crave, making even lean cuts like chicken breast incredibly tender.
- Flavor Penetration: Unlike merely seasoning the surface, a wet brine allows flavor to permeate throughout the entire piece of chicken. Every bite will be consistently seasoned and delicious, rather than just the exterior. This uniform seasoning is a game-changer for taste.
This careful balance of salt, water, and other complementary ingredients ensures that your poultry doesn't just taste good on the outside but is flavorful and moist all the way to the bone. It's a reliable way to get perfectly seasoned poultry with less risk of dry meat. For a deeper dive into the precise measurements and the impact of salt ratios, explore our comprehensive guide on Master Juicy Chicken: Salt Ratios, Timing, and Brining Secrets.
Your 5-Ingredient Secret Weapon: The Simple Chicken Brine Recipe
The beauty of this effective chicken brine lies in its simplicity. You don't need exotic ingredients or complex steps; just five pantry staples are enough to achieve amazing results. Here’s a breakdown of the essential components and their individual contributions:
- Warm Water (approximately 1 gallon): This is the foundation of your wet brine. Using warm water initially helps to dissolve the salt and sugar quickly and thoroughly. However, it's crucial to cool the brine completely before adding the chicken to prevent any food safety risks.
- Kosher Salt: The undisputed star of the brine. Kosher salt is preferred for brining because its larger crystals dissolve well and it contains no iodine, which can sometimes impart an off-flavor. It's the primary agent responsible for tenderizing the meat, helping it retain moisture, and thoroughly seasoning it from within. For general brining, a 5-6% salt solution by weight (50-60 grams of salt per 1000 grams of water) is an excellent starting point, ensuring optimal flavor without over-salting. Remember that different salt types have different densities, so weighing is more accurate than volume when dealing with critical salt ratios.
- Soy Sauce: A secret weapon for enhancing flavor. Soy sauce contributes additional salinity, a rich umami depth, and a subtle savory complexity that elevates the chicken's natural taste. It's not just extra salt; it's an extra layer of flavor.
- White Sugar: A crucial balancing act. While not intended to make your chicken sweet, white sugar serves a couple of vital functions. It balances the strong saltiness of the brine, prevents the chicken from tasting overtly salty, and aids in promoting beautiful browning during cooking, leading to a more appealing crust.
- Olive Oil: Often overlooked, olive oil adds an extra layer of moisture and richness. It helps ensure the meat remains incredibly moist and tender by forming a protective layer that helps lock in the juices during cooking, contributing to a superior mouthfeel.
This combination creates a perfectly balanced solution that works synergistically to deliver maximum tenderness, juiciness, and flavor.
Mastering the Brining Process: Step-by-Step Guide and Pro Tips
Executing the brining process correctly is just as important as the ingredients themselves. Follow these steps for optimal results:
- Prepare the Brine: In a large, food-grade, non-reactive container (such as a stainless steel stockpot, enameled pot, or a brining bag), pour in your warm water. Add the kosher salt, soy sauce, white sugar, and olive oil. Stir vigorously until the salt and sugar are completely dissolved.
- Cool the Brine Completely: This step cannot be stressed enough for food safety. The brine *must* be cooled to refrigerator temperature before introducing raw chicken. You can speed this process by adding a couple of handfuls of ice to the solution or placing the container in an ice bath. Never place raw chicken in a lukewarm brine.
- Submerge the Chicken: Once the brine is chilled, carefully place your chicken into the solution, ensuring it is fully submerged. If the chicken floats, you can weigh it down with a clean, non-reactive plate.
- Refrigerate for the Recommended Time: Brining times vary significantly depending on the cut and size of your chicken:
- Skinless Chicken Breasts: Brine for approximately 2 hours. These lean cuts can become too salty or develop a mushy texture if over-brined.
- Bone-in Chicken Pieces (Thighs, Drumsticks, Wings): Brine for 4 hours.
- Whole Chickens: Brine for at least 4 hours, and up to overnight (8-12 hours) for maximum impact.
Always keep the chicken submerged in the brine in the refrigerator during this period. Over-brining can lead to overly salty or texturally compromised meat, so sticking to these guidelines is key.
- Post-Brining Care: Once the brining time is complete, remove the chicken from the brine. Some cooks prefer to give the chicken a quick rinse under cold water to remove any excess surface salt, especially if using a higher salt concentration or brining for a longer period.
- Pat Dry and Air Chill: This is a crucial step for achieving crispy skin and superior browning. Pat the chicken very dry with paper towels. For an even better result, place the brined and dried chicken on a wire rack set over a baking sheet and refrigerate it uncovered for 1-12 hours. This air-drying process allows the surface of the chicken to dry out, which is essential for developing a beautiful, golden crust when cooked.
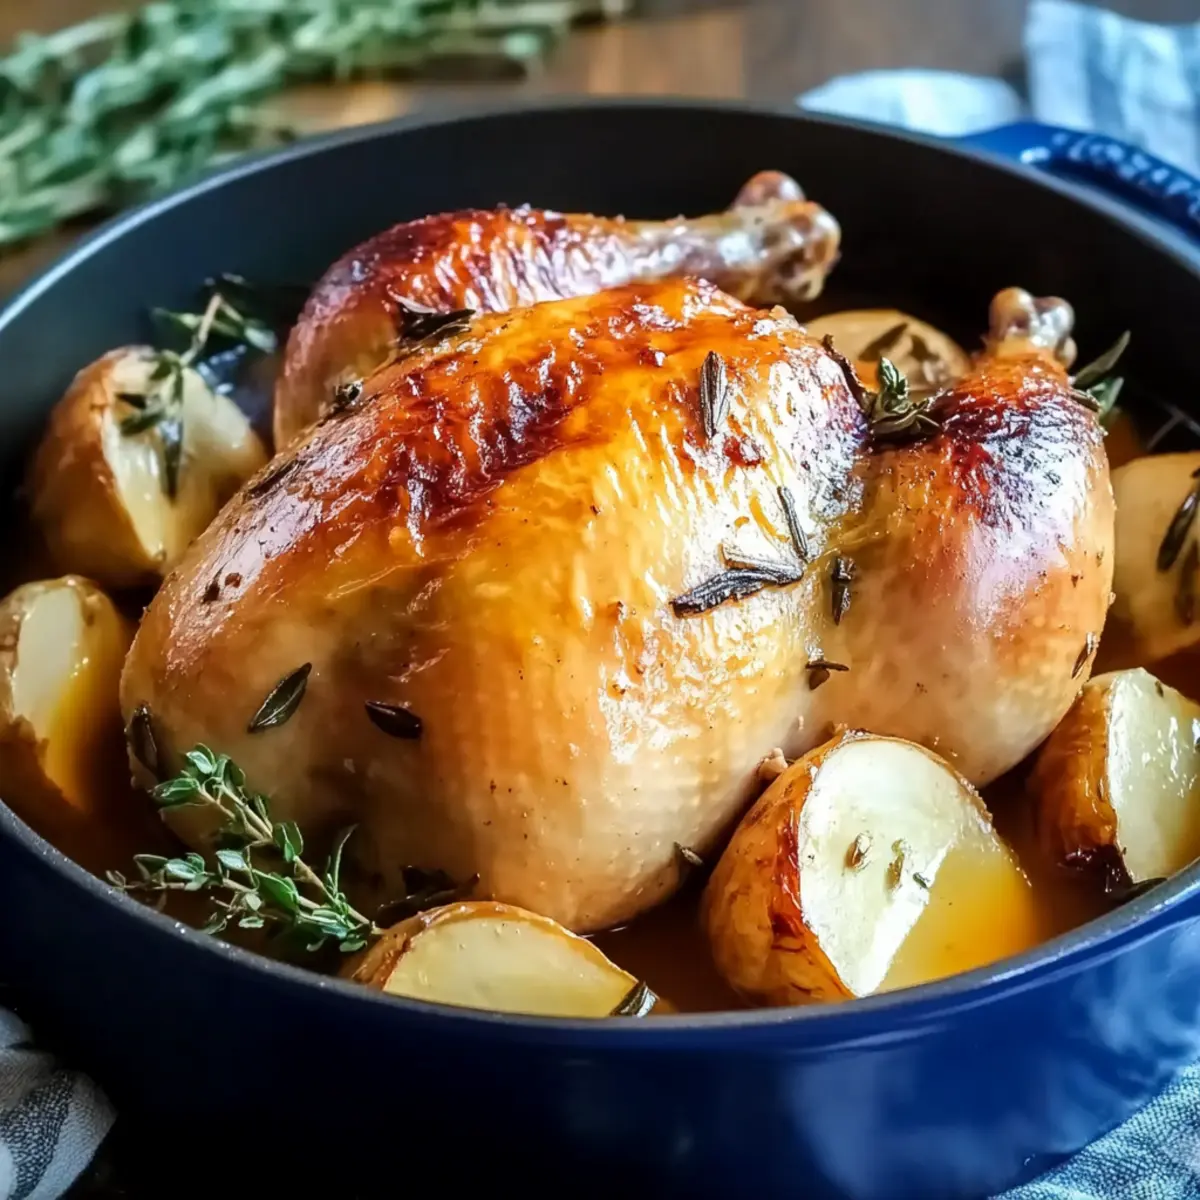
- Cook to Perfection: Cook your brined chicken using your preferred method (grilling, roasting, frying) until it reaches an internal temperature of 165°F (74°C) in the thickest part. Always use a meat thermometer for accuracy. You'll notice an unparalleled juiciness and tenderness.
Understanding these steps ensures that you don't just brine your chicken, but you truly master the technique. For more detailed insights on how brining benefits various cuts, check out our article: Never Dry Chicken Again: Brine Any Cut for Ultimate Moisture.
Beyond the Basics: Customizing Your Brine & Troubleshooting
While the 5-ingredient chicken brine is a phenomenal starting point, it also serves as an excellent base for experimentation. Here's how you can customize your brine and avoid common pitfalls:
Flavor Enhancements:
- Aromatics: Infuse your brine with whole garlic cloves, sliced onions, or crushed ginger for an aromatic boost.
- Herbs & Spices: Fresh rosemary, thyme, bay leaves, black peppercorns, or even a pinch of red pepper flakes can add wonderful complexity.
- Citrus: Lemon or orange zest (or even slices) can brighten the flavor profile. Be mindful with citrus juice or vinegar, as excessive acidity can "cook" the meat if left too long.
- Sweeteners: Experiment with brown sugar, maple syrup, or honey for different sweet notes and browning effects.
Salt Ratio Nuances:
As mentioned, the 5-6% salt by weight is a sweet spot. If you're using a different type of salt, such as fine table salt, remember that it's denser than kosher salt. You'll need to use less by volume (or stick to weight measurements) to avoid over-salting. Always start at the lower end of the percentage if you're unsure or experimenting with a new salt type.
Common Brining Mistakes to Avoid:
- Not Cooling the Brine: As emphasized, this is a food safety hazard and can also start to cook the chicken.
- Over-Brining: Leaving chicken in brine for too long can result in excessively salty meat and a spongy, unappealing texture. Stick to the recommended times.
- Not Drying the Chicken: Skipping the critical pat-dry and air-chill steps will lead to less crispy skin and poorer browning, diminishing the visual and textural appeal.
- Using Reactive Containers: Aluminum or cast iron can react with the salt in the brine, imparting metallic flavors and potentially damaging your cookware. Always use food-grade, non-reactive materials.
- Not Fully Submerging the Chicken: Any part of the chicken not covered by the brine won't benefit from the process, leading to uneven results.
Conclusion
Embracing the technique of brining, especially with this straightforward 5-ingredient chicken brine, is a game-changer for anyone looking to elevate their poultry dishes. It’s a simple investment of time that pays off immensely in flavor, tenderness, and juiciness. No more dry chicken; no more bland bites. By understanding the science, mastering the basic recipe, and following a few key steps, you can confidently prepare perfectly tender and deeply flavorful chicken that will impress every time. So, gather your ingredients, give it a try, and discover the unmatched satisfaction of truly succulent chicken.
