Master Juicy Chicken: Salt Ratios, Timing, and Brining Secrets
Tired of dry, uninspired chicken? You're not alone. Many home cooks struggle to achieve that consistently juicy, flavorful result every time they cook poultry. The secret weapon often overlooked is a simple yet incredibly effective technique: brining. A well-executed **chicken brine** can transform even the leanest cuts into a succulent, tender masterpiece, ensuring every bite is moist and perfectly seasoned from the inside out. Forget bland and dry; embracing the art of the brine is your passport to culinary success with chicken.
The Science Behind the Succulence: Why Chicken Brine Works Wonders
At its core, brining is a process where chicken is submerged in a saltwater solution before cooking. This isn't just about adding flavor to the surface; it's a scientific marvel that fundamentally changes the meat's structure. Here’s how it works:
1. **Moisture Retention:** The salt in the brine solution helps denature (unravel) some of the muscle proteins in the chicken. As these proteins relax, they become less prone to tightening and expelling moisture during cooking. This means the chicken holds onto significantly more water, resulting in a dramatically juicier final product.
2. **Seasoning Throughout:** Unlike simply sprinkling salt on the surface, a wet **chicken brine** allows the salt to penetrate deep into the meat. This ensures that every fiber of the chicken is seasoned, delivering a consistent, delightful flavor profile with each mouthful, rather than just a salty exterior.
3. **Tenderization:** The softened muscle fibers also contribute to a more tender texture. Even lean cuts like chicken breasts, notorious for drying out, emerge from a brine incredibly supple and moist.
While dry brining (applying salt directly to the chicken) is another fantastic method, this guide will focus on the power of a wet **chicken brine** for its superior moisture retention and ability to infuse a broader range of flavors.
Crafting Your Perfect Chicken Brine: Ingredients and Ratios
A basic **chicken brine** is incredibly simple, requiring just a few common pantry staples. However, understanding the correct ratios and the role each ingredient plays is key to consistent success.
The foundation of any wet brine is water and salt. For optimal results, a salt concentration between 5-6% by weight is ideal. This translates to approximately 50-60 grams of salt per 1000 grams (1 liter) of water.
*
Salt Type Matters: Always use kosher salt for brining. Its larger crystals and lack of iodine (which can impart a metallic taste) make it perfect. If you absolutely must use table salt, reduce the quantity slightly, as table salt is denser and can taste saltier.
*
Water: Use good quality water. While starting with warm water helps dissolve the solids, always ensure the brine is thoroughly chilled before introducing the chicken.
Beyond the fundamental salt and water, other ingredients can elevate your **chicken brine** from good to exceptional:
*
Sugar: A touch of white sugar (or brown sugar) adds a subtle sweetness that balances the saltiness. Crucially, sugar also aids in achieving beautiful caramelization and browning on the chicken skin during cooking.
*
Soy Sauce: For an extra layer of umami and depth, soy sauce is a fantastic addition. It contributes additional salt and a savory complexity that enhances the chicken's natural flavors.
*
Olive Oil: A small amount of olive oil in the brine can further contribute to a moist and tender result, helping the chicken retain its natural fats and flavor.
For a fantastic starting point that incorporates these enhancers, consider exploring recipes like
Perfectly Tender Chicken: The Simple 5-Ingredient Brine, which provides a balanced formula for consistently delicious results.
Beyond the Basics: Elevating Your Brine with Aromatics
While salt and sugar do the heavy lifting for tenderness and moisture, the true magic of a custom **chicken brine** often lies in the aromatics. These ingredients don't penetrate the meat as deeply as salt, but they infuse the surface and the surrounding liquid with incredible fragrance and nuanced flavor.
Experiment with:
*
Herbs: Fresh rosemary, thyme, sage, or bay leaves.
*
Spices: Black peppercorns, coriander seeds, mustard seeds, or even a touch of red pepper flakes for a subtle kick.
*
Citrus: Sliced lemons, oranges, or limes can add brightness and a refreshing zest.
*
Alliums: Crushed garlic cloves, sliced onions, or shallots contribute savory depth.
Simmer these aromatics briefly with a small portion of the water to extract their flavors before adding them to the main brine solution and chilling.
The Brining Process: From Prep to Perfection
Once you have your ingredients ready, the actual brining process is straightforward, but attention to detail ensures safety and success.
Step-by-Step Brine Preparation
1.
Dissolve Solids: In a large, food-grade container (more on this below), pour a small portion of your water (warm is best for this step). Add your salt, sugar, and any other dissolvable ingredients like soy sauce. Stir vigorously until everything is completely dissolved.
2.
Cool Down: This step is critical. Add the remaining water, preferably cold, and a few handfuls of ice to rapidly bring the brine's temperature down. You want the brine to be refrigerator-cold (around 40°F / 4°C or below) before adding the chicken. Never place raw chicken in a lukewarm brine, as this can create a breeding ground for bacteria.
3.
Choose Your Container Wisely: Always use a food-grade, non-reactive container. Excellent options include stainless steel or enameled stockpots, large food-grade plastic buckets, or even dedicated brining bags. Avoid aluminum or reactive metals that can react with the salt and impart an off-flavor to your chicken.
Submerging and Timing Your Chicken Brine
With your cold brine ready, it's time to introduce the chicken:
1.
Submerge Completely: Gently place your chicken pieces or whole bird into the chilled brine, ensuring it is fully submerged. If the chicken floats, place a small, clean plate on top to weigh it down and keep it under the liquid.
2.
Refrigerate: Cover the container tightly and place it in the refrigerator for the recommended brining time. Temperature control during brining is paramount for food safety.
3.
Timing is Everything: The duration of your brine depends on the size and cut of chicken.
*
Skinless Chicken Breasts: 1.5 to 2 hours.
*
Bone-in Chicken Pieces (thighs, drumsticks): 3 to 4 hours.
*
Whole Chickens: A minimum of 4 hours, or ideally overnight (8-12 hours) for best results.
For more precise guidance on brining various cuts and ensuring optimal moisture for every piece, check out
Never Dry Chicken Again: Brine Any Cut for Ultimate Moisture. Over-brining can result in overly salty or mushy chicken, so stick to these guidelines.
Post-Brine Care for Optimal Results
Your work isn't done once the brining time is up. Proper post-brine care is essential for achieving that perfect golden skin and maximum flavor.
1.
Rinse (If Necessary): If you used a higher salt concentration (closer to 6%) or brined for an extended period, a quick rinse under cold running water can help remove any excess surface salt. However, for standard brining times and ratios, many cooks skip this step.
2.
Pat Dry, Thoroughly: This is a non-negotiable step! Using paper towels, pat every surface of the chicken aggressively until it is completely dry. Moisture on the skin prevents browning and crisping. The drier the surface, the crispier your skin will be.
3.
Optional Air-Dry: For an extra crispy skin and enhanced browning, place the patted-dry chicken on a wire rack set over a baking sheet and return it to the refrigerator, uncovered, for 1 to 12 hours. This further dehydrates the skin, leading to unparalleled texture.
4.
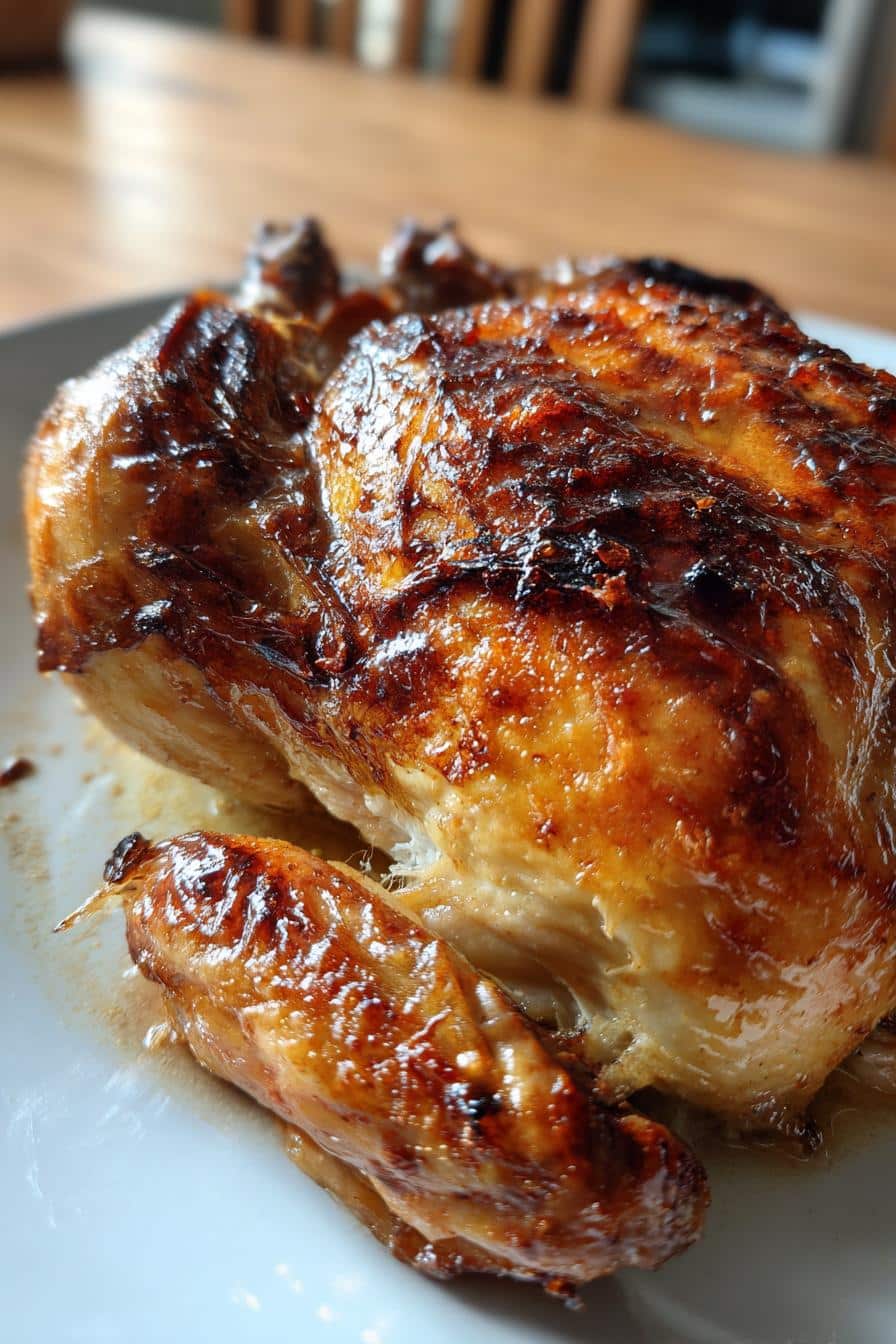
Cook to Perfection: Regardless of your chosen cooking method (roasting, grilling, frying), always cook your brined chicken to an internal temperature of 165°F (74°C) in the thickest part. Use a reliable meat thermometer to ensure both safety and the best possible texture.
Brining seasons the chicken all the way through, so be mindful of adding additional salt during cooking. Taste as you go, and remember that a properly brined chicken will need less external seasoning.
Conclusion
Mastering the art of the **chicken brine** is a game-changer for any home cook aspiring to consistently prepare tender, juicy, and flavorful poultry. By understanding the science behind salt ratios, adhering to precise timing, and implementing smart post-brine techniques, you can elevate your chicken dishes from ordinary to extraordinary. With just a few simple ingredients and a little patience, you'll unlock the secret to succulent chicken that will impress every time. So, gather your ingredients, follow these steps, and prepare to enjoy the most delicious chicken you've ever made!